Static IP on HyperV VM

On the way become backend developer
Introduction
For those who need Linux, Windows already have WSL, but for some reason, I prefer to choose a virtual machine. IMO, WSL might be a good option for simple tasks but not for software development. For example a cron job, you have to configure manually with a task scheduler. So it's not so simple and needs an amount of time. WSL still has limited features and you need to configure it manually but it is easier for integrating applications and folders in WSL with your Windows.
So in my case, I prefer using a Linux Virtual Machine on my Windows. Even though it requires more resources than WSL. Hyper-V has already been included since Windows 10 in the Pro version. Because I don't like to install more software on my Windows. You just need to activate it in Windows Features.
But you need a static IP for the VM since you'll get a dynamic IP with the default bridge network in Hyper-V. So here is how I set a static IP in Hyper-V VM.
Steps
1. Create Internal Network Adapter on Windows
First, we have to create an internal network. In the "Actions" Panel on the right top, click "Virtual Switch Manager". After the Virtual Switch Manager window is shown, create a virtual switch. And the type is Internal. Then click "Create Virtual Switch" button.
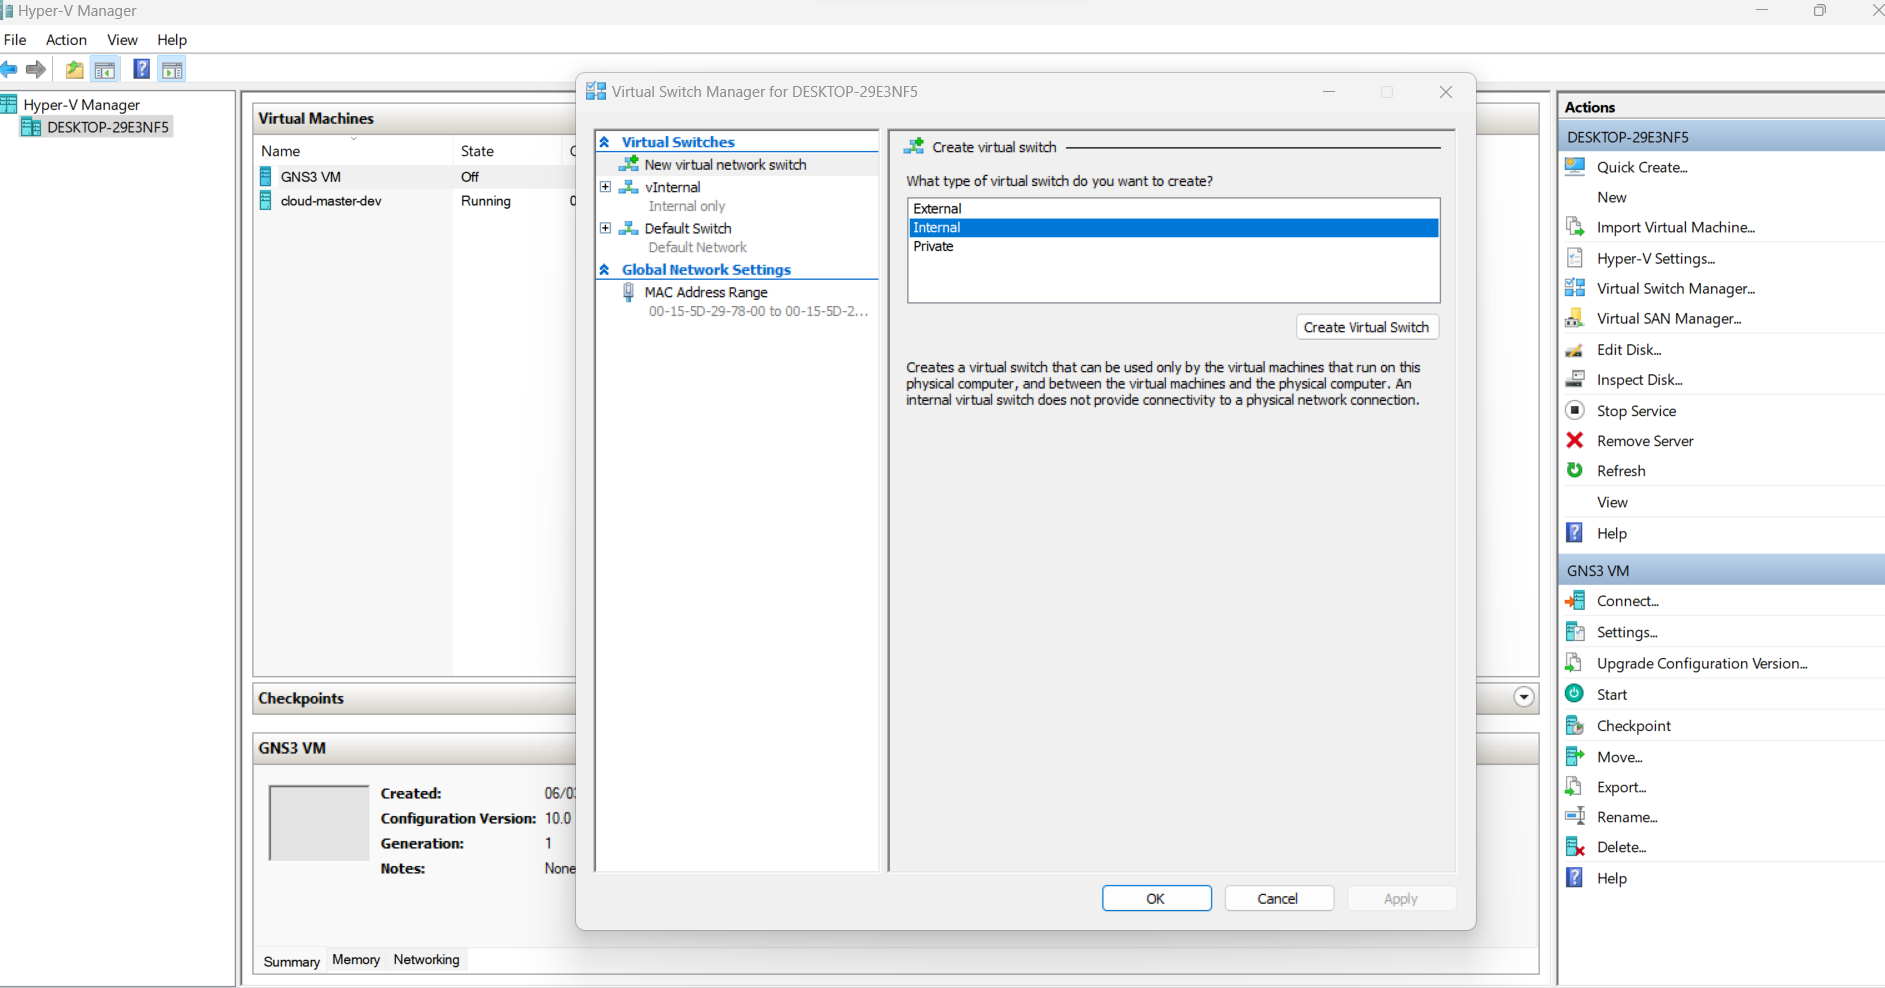
In this case, I will name it "vExampleInternal". Then click "Ok" button.
2. Set IP Range for Virtual Network
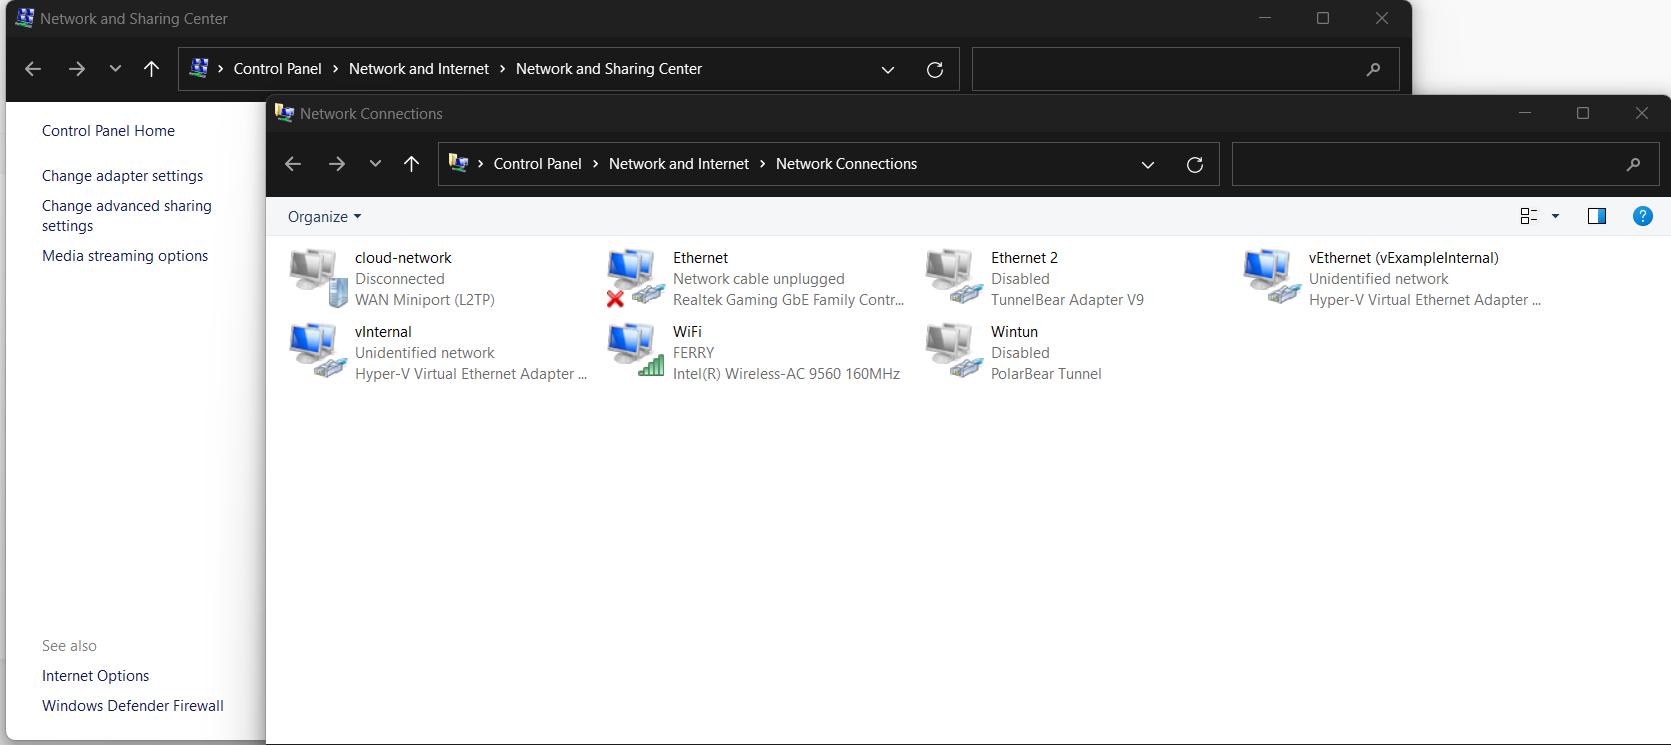
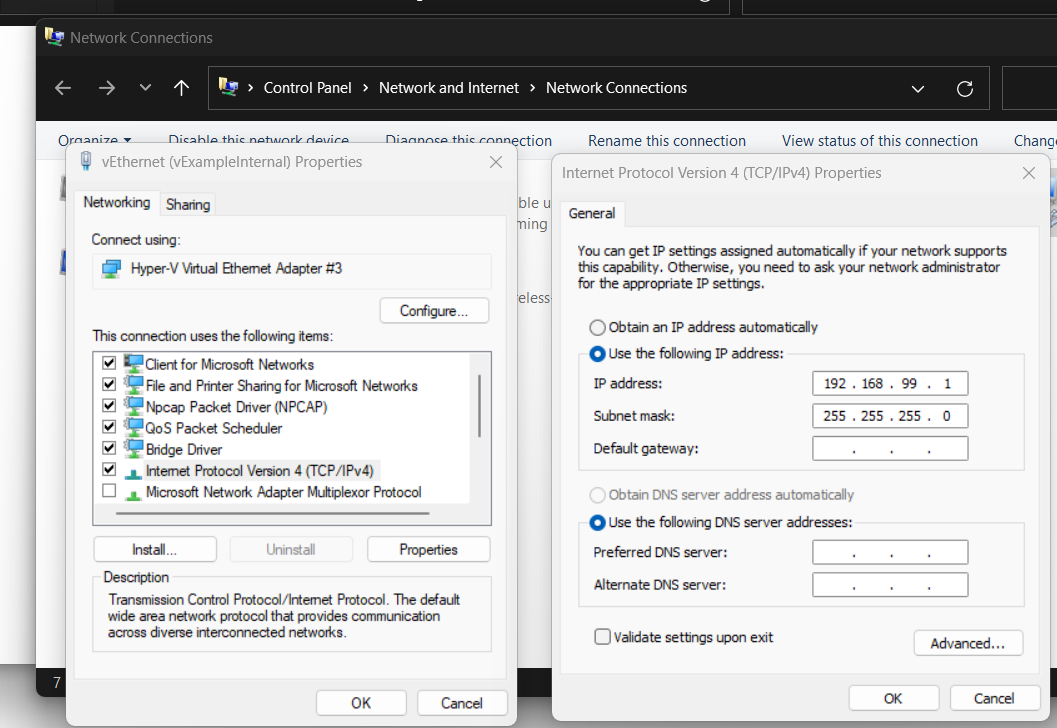
Then we set the IP range which will be used by Windows and VM. In the Network and Internet section from Control Panel. Click "Change adapter settings". After networks adapter is shown, right-click your virtual switch and click "Properties". Search for Internet Protocol Version 4 (TCP/IPv4) and double-click.
Then select "Use the following IP Address" and fill in the IP range that you want. And last click "Ok" button
3. Add New Network Adapter on Virtual Machine
If you have no virtual machine yet, create your virtual machine in Hyper-V. In this case, I will use Ubuntu Server 22. Let's name it "test-vm". I choose to store virtual machine in non-default location. It depends on your favor. In "Configure Networking" section, for the first connection I choose "Default Switch". Because it automatically configured network connection by Hyper-V so our virtual machine will get the same connection as the Windows network. It will be the source of our virtual machine internet. And if we don't need internet for our virtual machine, we just have to disable the connection from this first network adapter.
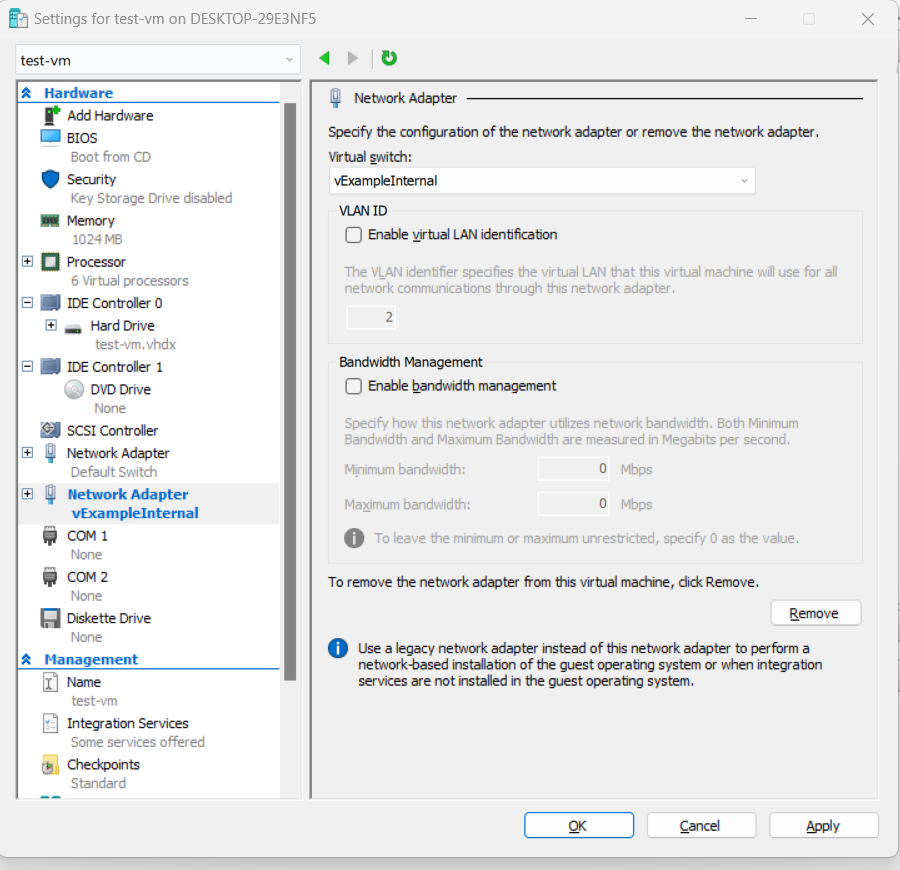
Let's say that we have already installed our VM, then create our second network adapter by right-clicking your virtual machine, and clicking "Settings". Make sure your VM is already stopped first. In "Hardware" section, click "Add Hardware" then "Network Adapter" and Add it. So in the second network adapter, in "Virtual Switch" section, choose our virtual network that we create before. And click "Ok" button
4. Restart Virtual Machine
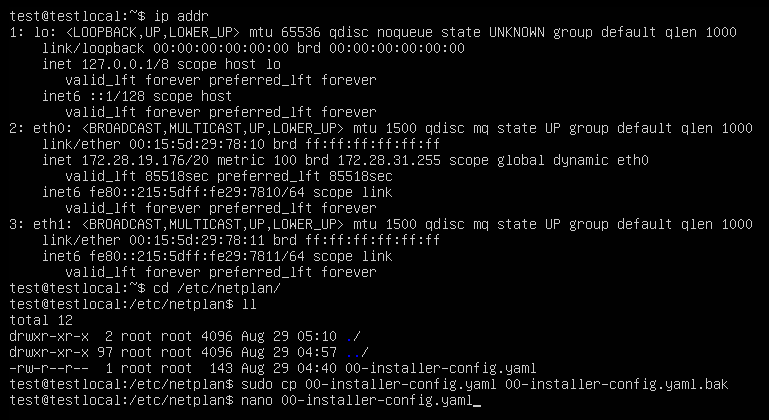
Start your VM again, and set static IP for VM. The configuration might be different for each operating system, you can search on the Internet how to set static IP of your Linux operating system. Because I use Ubuntu Server 22, the network config is using netplan. And my configuration is shown below. (I forgot to use sudo for nano command, you can add sudo in nano command since netplan configuration is in root directory).
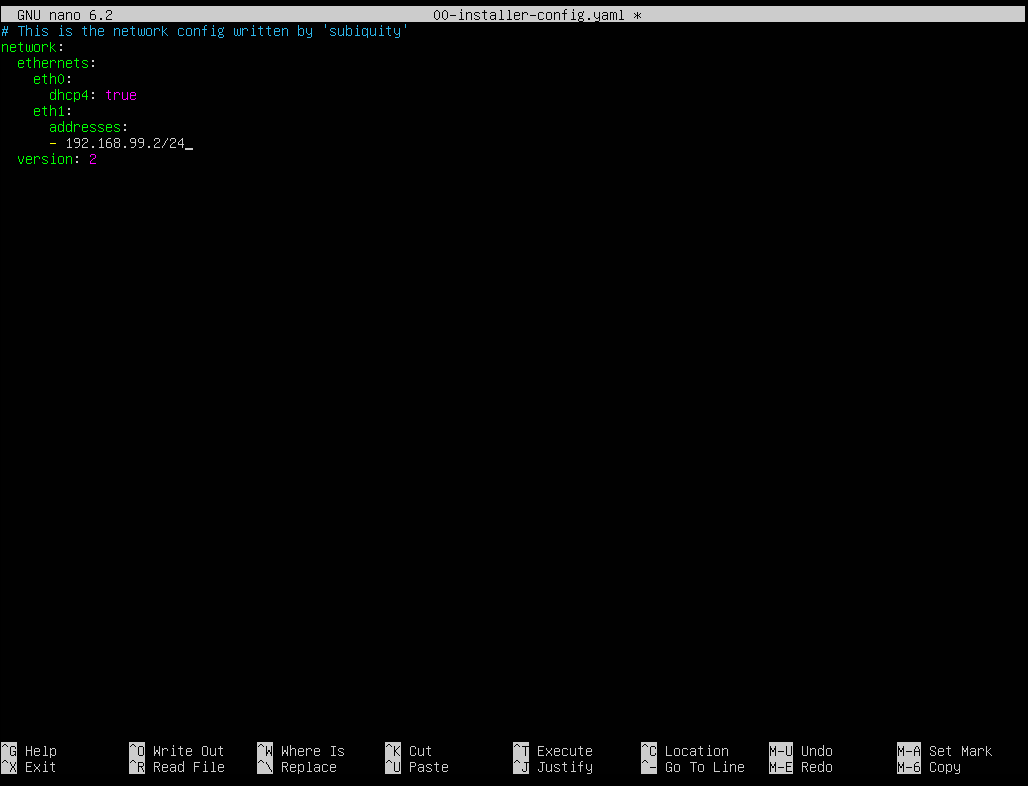
Don't forget to apply your configuration in your Linux VM.
5. Test Ping from Windows to Virtual Machine
Now, open your Terminal in Windows, whether it is Powershell or CMD, and run these command to refresh the network interface.
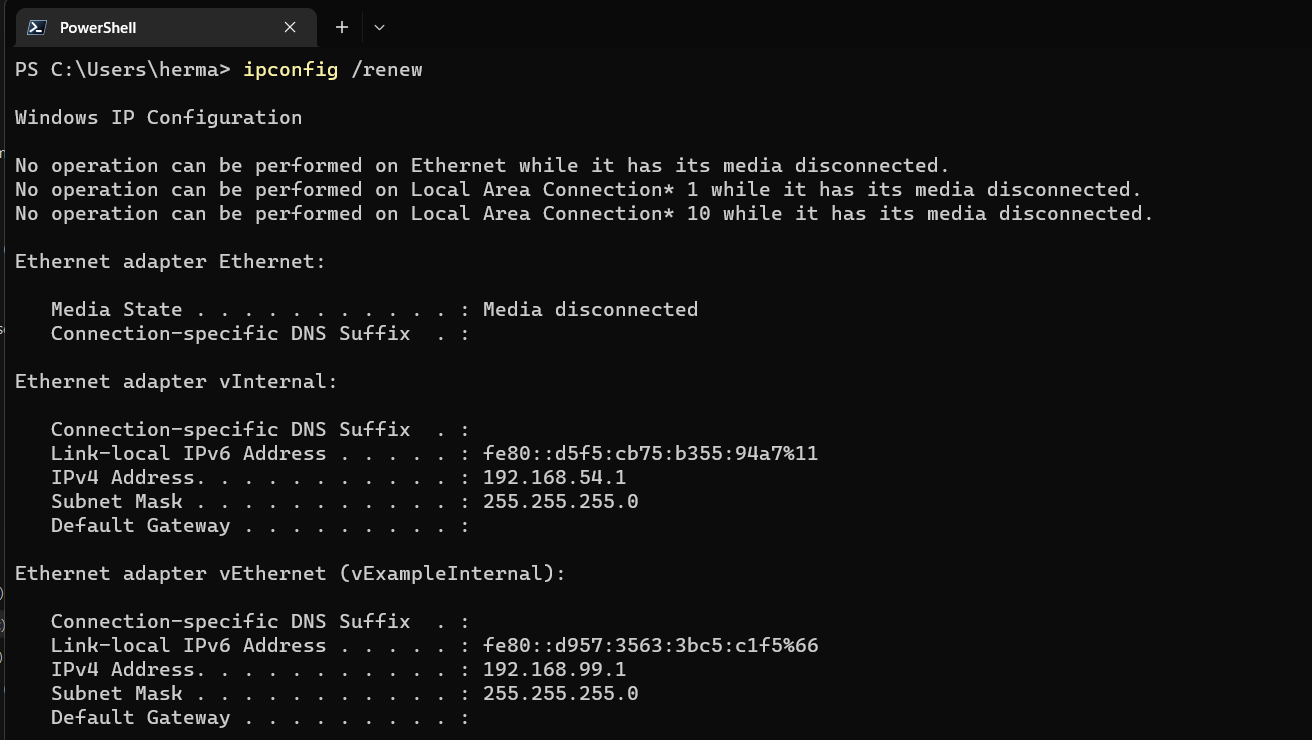
Now try to ping the IP address of Windows and your VM.
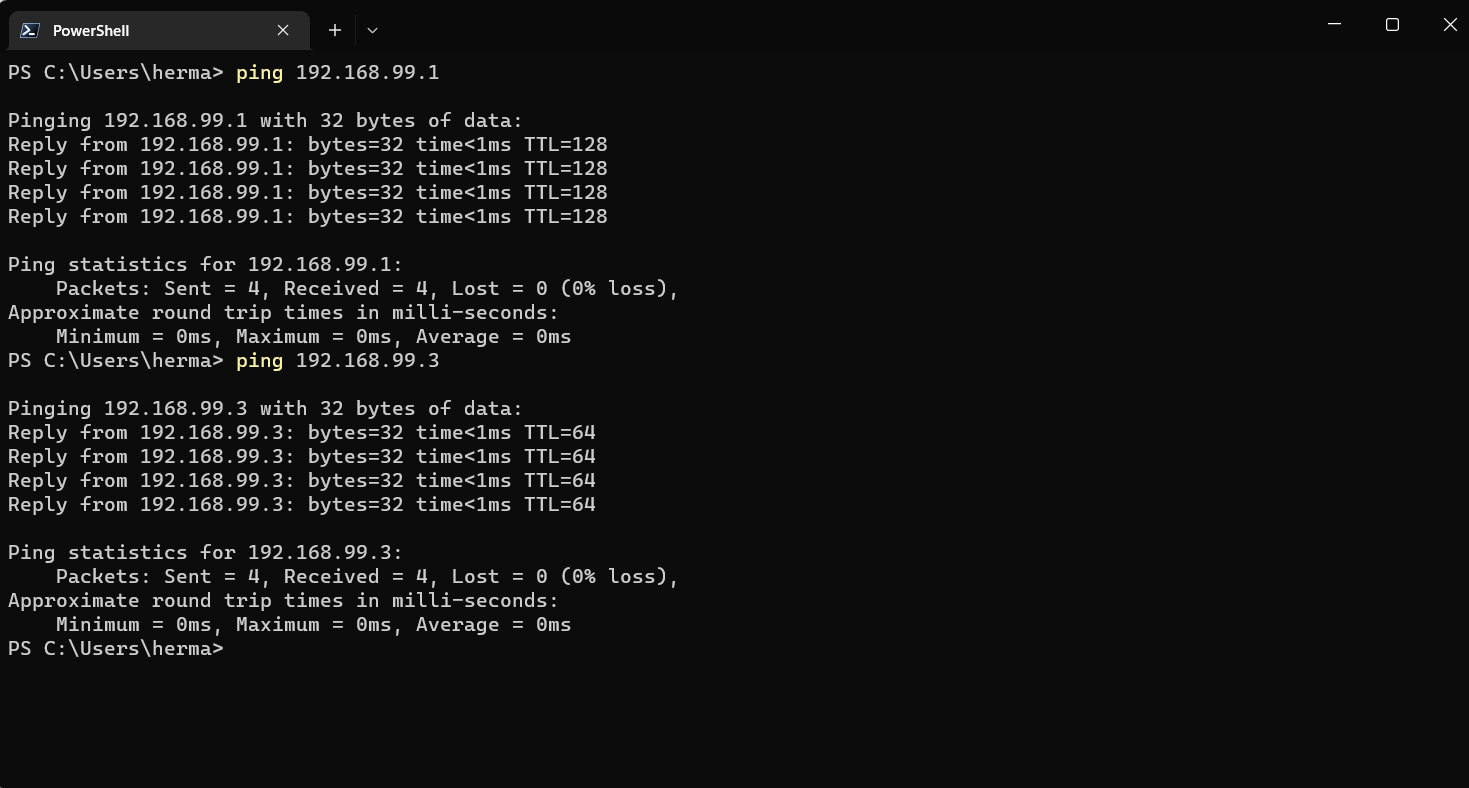
and voila, now you can start communicating with your VM.
Common Problem
But if you realize that we can't ping the VM IP address from windows, the common problem is that Windows is blocking your connection since the virtual network adapter is in the public network. By default, the public network is blocking unknown network connections to and from your windows. Or if you are using Antivirus, you have to allow these connection in their firewall.
If you are concerned about security risks, you can add a windows firewall rule for each connection you need. But in my case, I like to make these connection private. So it becomes less secure but easier than adding windows firewall rule for each connection.
Change Virtual Network Adapter to Private
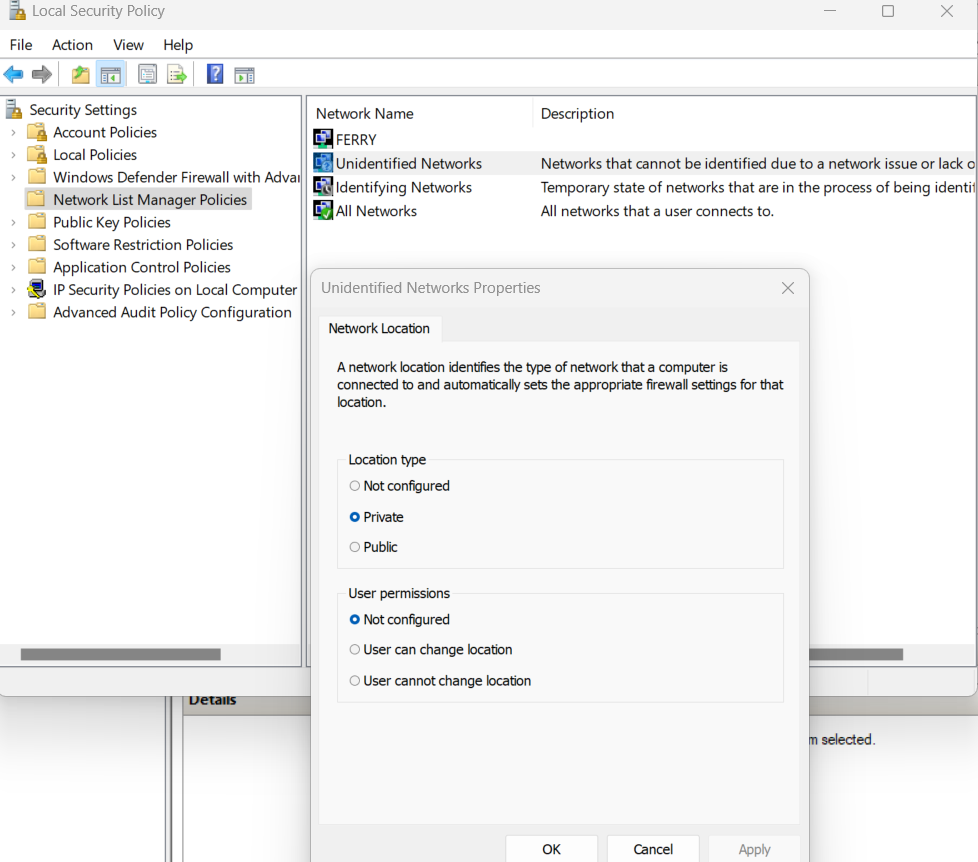
To make these connection private, you can change it from "Local Security Policy". In the "Network List Manager Policies", double-click "Unidentified Networks" and change "Location type" to "Private"